I posted a picture of a little impromptu carrier I made for my iPod, and Gari asked me if I was going to do a tutorial. So, I am going to give it a go.
First cut 2 pieces of fabric and use some scrap batting to make a sandwich and quilt as desired. I just used straight lines.

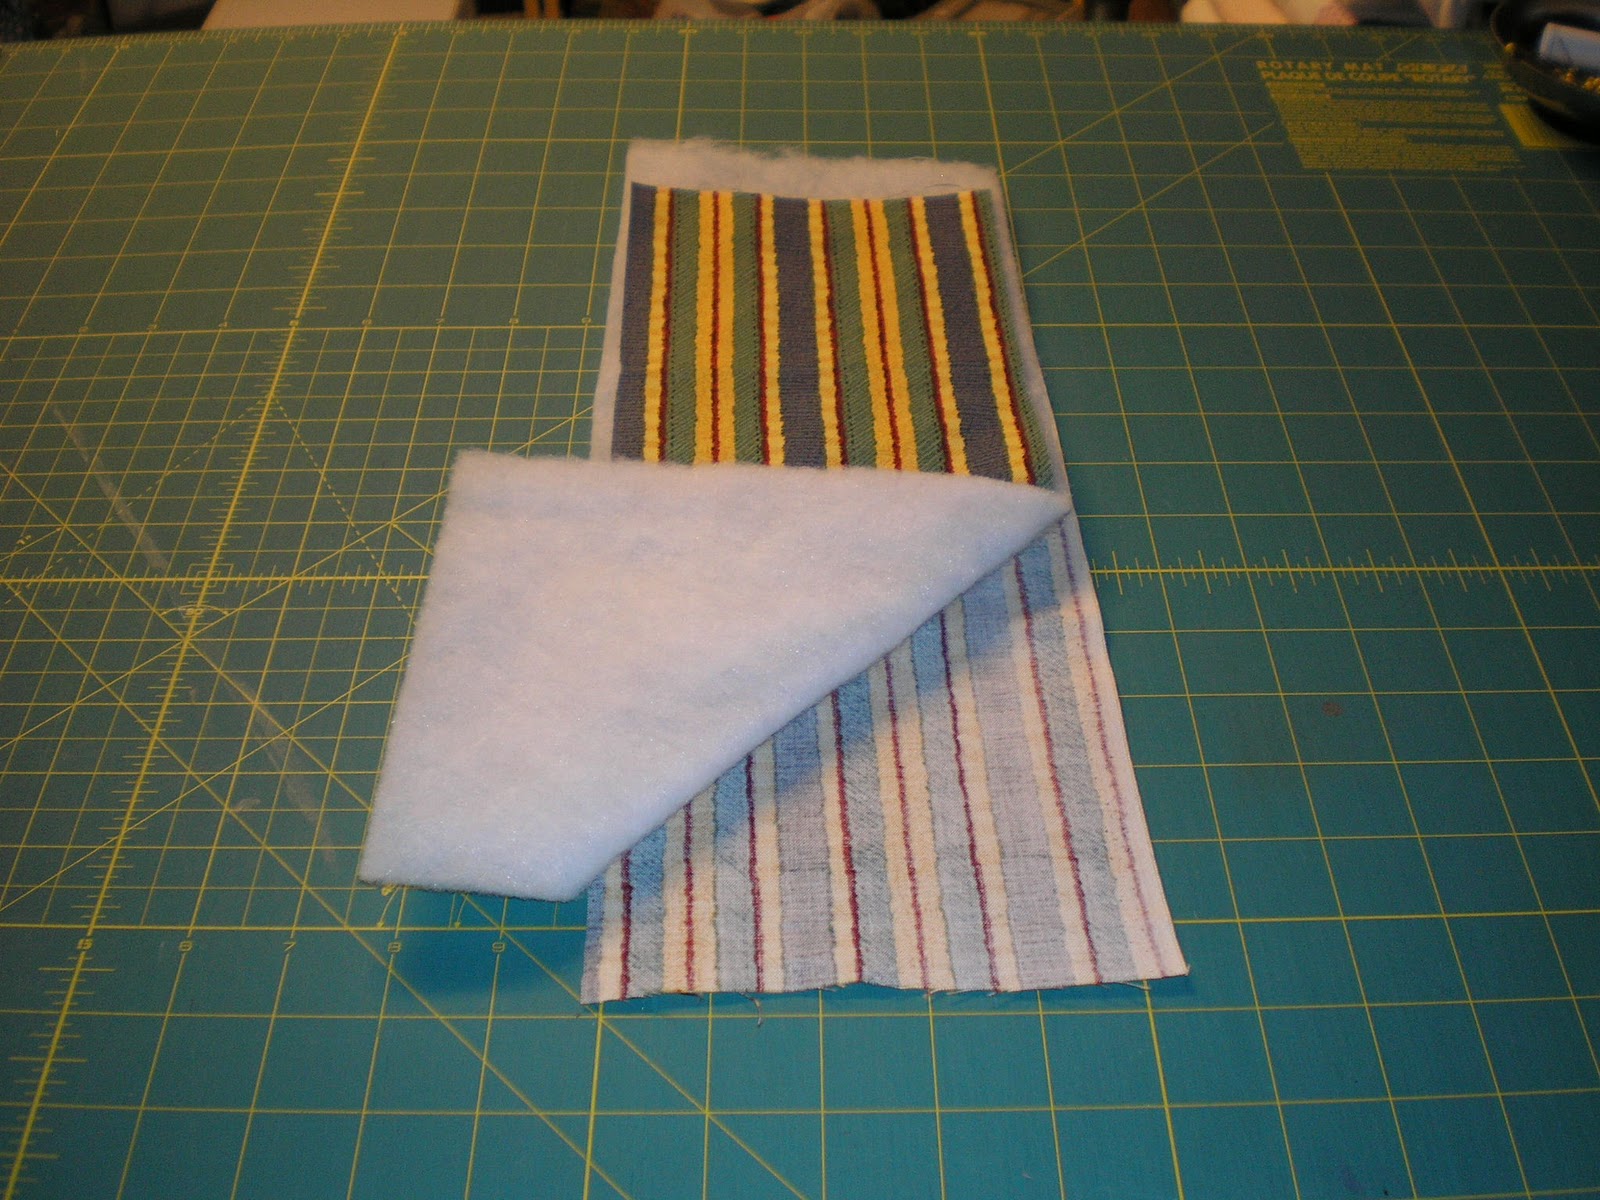

Trim sandwich, and sew binding to top and bottom. I used single binding and turned to other side and top stitched.


Trim binding even with sides.

Lay device on sandwich and pull up edge to just cover top of device.
My iPod is sticking up a bit just to show you.

Turn to opposite side and sew up sides almost to top of pocket. (to sew on strap binding.) I forgot to do this and had to remove a bit of stitching to apply rest of binding.

Turn right side out.

Draw lines where you want your handle to be and cut the shape. The more gradual the curve, the easier it is to apply the binding.

Sew binding to curved sides of handle. This is where I had to snip some stitches...

Now go back and sew the open part at the top of the sides.

Turn right sides out. Almost finished.

Fold top down to just above opening and stitch securely. If you don't want the sewing line on the back, you could make your handle a little longer and secure with a button or snap.

And there you have it.

An Ipod (or iPhone) carrier to hook to your belt.
I hope this is clear. I think you can get the basics of what I am trying to say, but if there are any questions...
Later,
Wilma NC


3 COMMENT:
Alright Wilma - love your sharing. I think it is wonderful. It's hard to give dimensions when everyone's ipod, phone, etc... are all different sizes = you just show that with some creativity, you can accomplish some wonderful things. Great gift - especially a great 'mans' gift, which are tough to come by.
Excellent, just what I wanted. Thanks!
Wilma seems good so far. May give it a try a later this week . Thanks Quilter000
Post a Comment